

Find the right track. Download it. Keep your library clean.
Spotify & YouTube Music Downloader CLI
Choose the instructions for your operating system below. The source installation works without a PyPI release. uv installs Python 3.13 and keeps Frogify in its own environment; you do not need to install Python separately.
| Component | Purpose |
|---|---|
| Python 3.12+ | Runs the Python package; managed by uv or bundled in the standalone executable. |
| Git | Required for installation from the Git URL or a cloned checkout. |
| FFmpeg | Required for CSV metadata tagging, which is enabled by default. |
| ffprobe | Fallback audio-duration validation; normally installed with FFmpeg. |
| aria2 | Optional download acceleration. The executable is named aria2c. |
The project version is 0.2.0, an early pre-1.0 candidate. The standalone Linux option below requires published release assets. Installation and audio searches require internet access.
Open PowerShell and install the required tools with WinGet. If winget is unavailable,
install or update App Installer in Microsoft Store, then reopen PowerShell.
winget install --exact --id astral-sh.uv
winget install --exact --id Git.Git
winget install --exact --id Gyan.FFmpeg

# Optional download acceleration
winget install --exact --id aria2.aria2
Close and reopen PowerShell so the installed commands are on PATH. Install Frogify:
uv tool install --python 3.13 "git+https://github.com/wittg3n/frogify-cli.git"
uv tool update-shell
Open a new PowerShell window, then run frogify --version and frogify doctor.
The verification and troubleshooting sections below explain missing-tool messages.
If you already have Git and FFmpeg but cannot install uv through WinGet, use its PowerShell installer, reopen PowerShell, and run the same Frogify installation commands:
powershell -ExecutionPolicy ByPass -c "irm https://astral.sh/uv/install.ps1 | iex"Open Terminal. If Homebrew is not installed, install it:
/bin/bash -c "$(curl -fsSL https://raw.githubusercontent.com/Homebrew/install/HEAD/install.sh)"Complete any developer-tools prompt and run the shell setup commands printed under Next steps by the installer. These put Homebrew on PATH for future terminals. For the current terminal, load Homebrew from its default installation directory:
if [ -x /opt/homebrew/bin/brew ]; then
  eval "$(/opt/homebrew/bin/brew shellenv)"
else
  eval "$(/usr/local/bin/brew shellenv)"
fi
Install the tools and Frogify:
brew install uv git ffmpeg

# Optional download acceleration
brew install aria2

uv tool install --python 3.13 "git+https://github.com/wittg3n/frogify-cli.git"
uv tool update-shell
Open a new terminal, then run frogify --version and frogify doctor.
Use an OS version supported by your package manager; older Macs may need the existing-Python
installation below and compatible builds of the audio tools.
First install system tools using the commands for your distribution. aria2 is optional
and can be omitted. Commands with sudo require administrator access; omit sudo if
you are already in a root shell. Install uv and Frogify as your normal user afterward.
Ubuntu, Debian, Linux Mint, and other Debian-based distributions:
sudo apt update
sudo apt install git curl ca-certificates ffmpeg aria2
If Ubuntu cannot find FFmpeg, enable Universe and retry:
sudo add-apt-repository universe
sudo apt update
sudo apt install ffmpeg
Fedora:
sudo dnf install git curl ca-certificates ffmpeg-free aria2Arch Linux, EndeavourOS, and Manjaro:
sudo pacman -Syu git curl ca-certificates ffmpeg aria2Alpine Linux: run as root, with the Community repository for your installed release
enabled in /etc/apk/repositories:
apk update
apk add git curl ca-certificates ffmpeg aria2
Alpine uses musl and cannot run the glibc standalone binary. Use this source route.
After installing system tools, return to your normal user account and install uv:
curl -LsSf https://astral.sh/uv/install.sh | shOpen a new terminal, or make the default uv installation available in the current shell:
export PATH="$HOME/.local/bin:$PATH"Install Frogify and configure its command on PATH:
uv tool install --python 3.13 "git+https://github.com/wittg3n/frogify-cli.git"
uv tool update-shell
Open a new terminal, then run frogify --version and frogify doctor. If uv cannot
provide Python for your platform, use an OS-supplied Python 3.12+ with the existing-Python
installation below. Non-MP3 batch tagging requires an FFmpeg build with libmp3lame.
Use this option once a GitHub release includes frogify-linux-x86_64.tar.gz and its
.sha256 file. It supports x86_64 / amd64 glibc-based Linux with glibc 2.17 or newer.
ARM64, Alpine/musl, Windows, and macOS need the Python/source route.
You need curl, tar, gzip, and either sha256sum or shasum. FFmpeg, ffprobe, and
optional aria2 remain external; install them with your system package manager as above.
On Ubuntu or Debian, the installer prerequisites are:
sudo apt update
sudo apt install curl ca-certificates tar gzip coreutils ffmpeg
Run the installer as your normal user:
curl -fsSL https://raw.githubusercontent.com/wittg3n/frogify-cli/main/install.sh | sh
export PATH="$HOME/.local/bin:$PATH"
frogify --version
frogify doctor
The default executable is $HOME/.local/bin/frogify. Add
export PATH="$HOME/.local/bin:$PATH" to ~/.bashrc for Bash or ~/.zshrc for Zsh to
keep it available in new terminals. You can also run "$HOME/.local/bin/frogify" directly.
The installer does not edit shell startup files, use sudo, or install system packages.
To select a published version or a different writable installation directory, download the script and pass the options to the shell that runs it:
curl -fsSL https://raw.githubusercontent.com/wittg3n/frogify-cli/main/install.sh -o frogify-install.sh
FROGIFY_VERSION=0.2.0 FROGIFY_INSTALL_DIR="$HOME/bin" sh frogify-install.sh
export PATH="$HOME/bin:$PATH"
FROGIFY_VERSION=v0.2.0 also works. Omit it to select the latest published release.
Use the chosen installation directory in your persistent PATH setting.
The installer verifies SHA-256 before extraction and preserves the previous executable
if downloading or validation fails. It saves notices, the component inventory, and license
texts under ${XDG_DATA_HOME:-$HOME/.local/share}/frogify/<version>/.
The matching frogify-linux-x86_64-sources.tar.gz and checksum are separate assets on the
same release; installation downloads only the binary archive and its checksum. The
installer prints the corresponding-source location after installation.
The executable unpacks private runtime files when it starts. If your temporary directory
disallows execution, set TMPDIR to a writable directory on a filesystem that permits it.
After installing uv and the audio tools, clone the repository:
git clone https://github.com/wittg3n/frogify-cli.git
cd frogify-cli
uv tool install --python 3.13 .
uv tool update-shell
If you already have a source ZIP, extract it and open a terminal in the directory containing
pyproject.toml. Run the last two commands there; Git is not needed for that installation.
Open a new terminal to use frogify from any directory.
Use this route if you already have Python 3.12+ and prefer a standard virtual environment. Install Git and the audio tools for your platform, then obtain the source:
git clone https://github.com/wittg3n/frogify-cli.git
cd frogify-cli
On Windows, use the Python launcher. Replace 3.13 with your installed version if needed:
py -3.13 -m venv .venv
.\.venv\Scripts\python.exe -m pip install --upgrade pip
.\.venv\Scripts\python.exe -m pip install .
.\.venv\Scripts\frogify.exe --help
Run .\.venv\Scripts\Activate.ps1 to make frogify available by name in that PowerShell
session. If script execution is restricted, keep using .\.venv\Scripts\frogify.exe;
activation is not required.
On macOS or Linux, replace python3.13 with your installed Python 3.12+ command:
python3.13 -m venv .venv
. .venv/bin/activate
python -m pip install --upgrade pip
python -m pip install .
frogify --help
Activate the environment in each new terminal, or run its executable directly. If your OS
packages venv or pip separately, install those packages first. Platforms without prebuilt
dependency wheels may also require a compiler and Python development headers.
Once a Frogify release is available on PyPI, you can use python -m pip install frogify
inside your virtual environment, or uv tool install --python 3.13 frogify, instead of
installing from source.
In a new terminal, or your activated virtual environment, run:
frogify --version
frogify --help
ffmpeg -version
ffprobe -version
frogify doctor
If you installed aria2, also run aria2c --version. doctor checks tools and provider
reachability; it may return a nonzero exit code for missing required tools or unreachable
providers. A successful check does not guarantee that a particular recording will download.
Try a search and a download:
frogify search "Massive Attack - Teardrop"
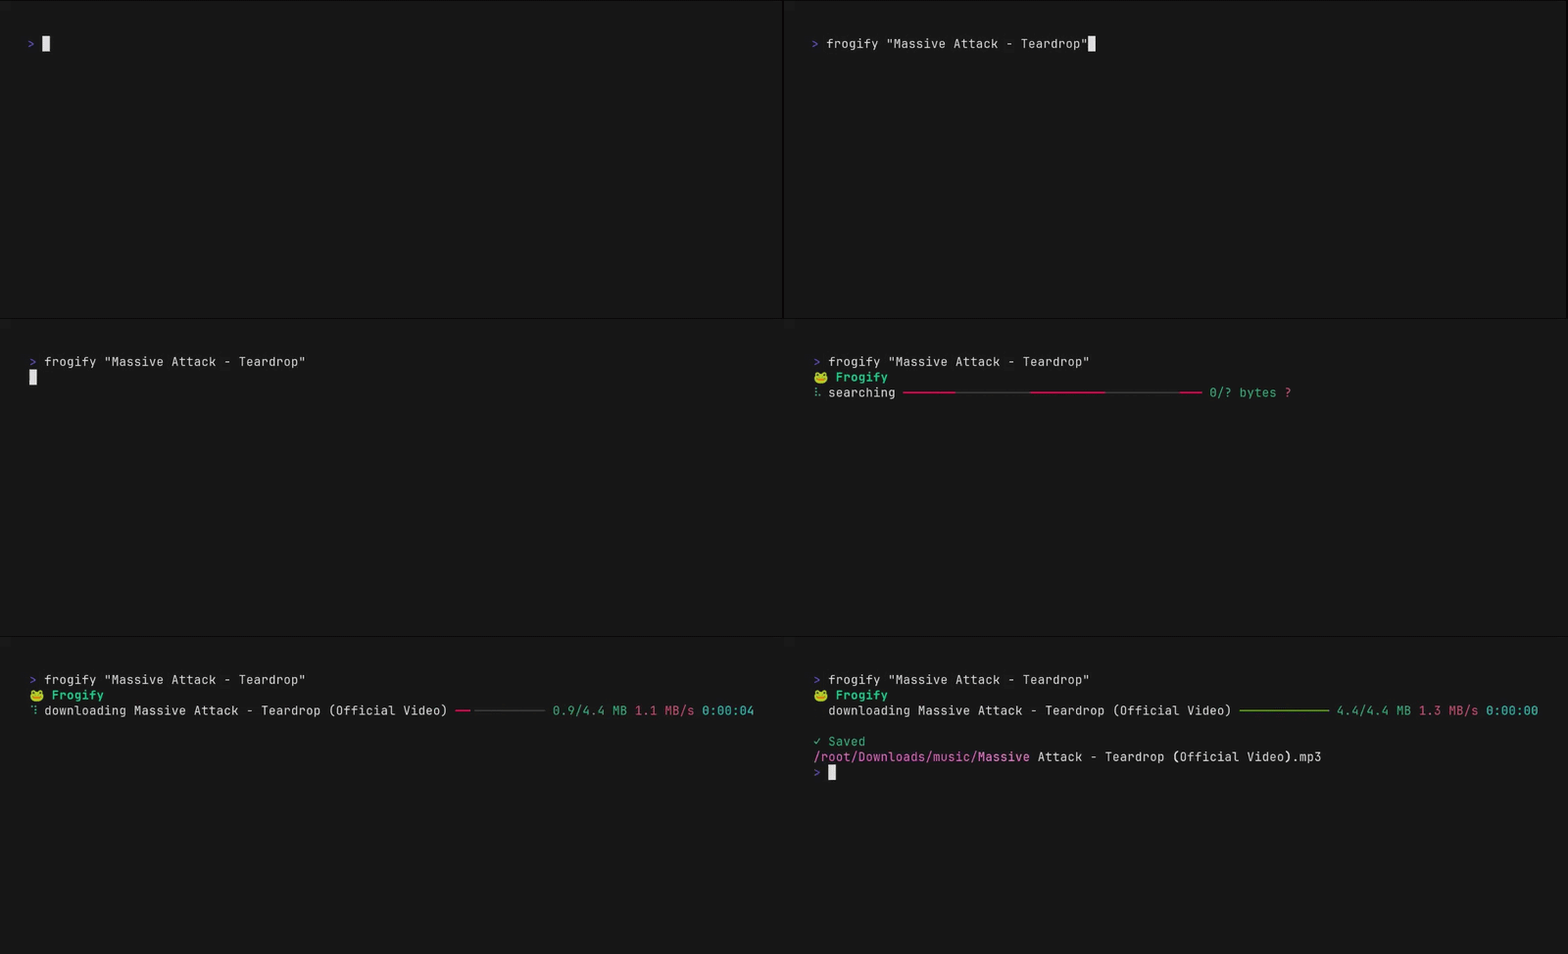
frogify "Massive Attack - Teardrop"
Audio is saved in a music subfolder inside your system Downloads directory by default.
Pass --output "./my-music" to choose another destination.
For the Git URL installation, refresh the source and reinstall:
uv tool install --reinstall --refresh --python 3.13 "git+https://github.com/wittg3n/frogify-cli.git"
frogify --version
For a cloned checkout, run these commands from its directory:
git pull --ff-only
uv tool install --reinstall --python 3.13 .
For a source ZIP, extract the newer source and run uv tool install --reinstall --python 3.13 .
from that directory. Virtual-environment users should instead run
python -m pip install --upgrade . with that environment's Python after updating the source.
For a PyPI installation, use uv tool upgrade frogify or python -m pip install --upgrade frogify.
For standalone Linux, rerun the installer. Preserve your FROGIFY_INSTALL_DIR override
if you used one; omit FROGIFY_VERSION to update to the latest published version.
To remove a uv installation:
uv tool uninstall frogifyFor pip, run python -m pip uninstall frogify with the same environment's Python.
For standalone Linux, remove only the installed executable:
rm "$HOME/.local/bin/frogify"Adjust that path if you chose another directory. Uninstalling the command leaves downloaded audio, configuration, download history, and separately installed system tools in place.
| Problem | Fix |
|---|---|
uv is not found |
Reopen the terminal. For the default standalone uv install, add $HOME/.local/bin to PATH on macOS/Linux or %USERPROFILE%\.local\bin to your user Path on Windows. |
frogify is not found after a uv install |
Run uv tool update-shell and reopen the terminal. uv tool dir --bin prints the executable directory to add to PATH manually. |
frogify is not found after a venv install |
Activate the environment, or run .venv/bin/frogify on macOS/Linux or .\.venv\Scripts\frogify.exe on Windows. |
| Standalone download returns 404 or cannot resolve a release | The selected release must provide both the Linux binary archive and its checksum. Use the source installation if those assets are unavailable. |
| FFmpeg or ffprobe is missing | Install FFmpeg using the platform commands above, then reopen the terminal. For manual Windows installations, add the folder containing the .exe files to your user Path. |
Unknown encoder 'libmp3lame' |
Install FFmpeg with MP3 encoder support, or run frogify config set metadata.enabled false to preserve source audio in batches. |
| aria2 is unavailable | Keep download.engine on auto for fallback, or run frogify config set download.engine requests. Explicit aria2 mode requires aria2c. |
doctor reports an unreachable provider |
Check your connection and retry later. Provider availability can change independently of your installation. |
On Windows, edit your user Path through Edit environment variables for your account →
Environment Variables → User variables → Path → Edit → New, then open a new terminal.
For more detail about a command failure, run frogify --debug search "Artist Track".
Finding a result is easy. Frogify tries to find the right recording.
- ✓ Smart track matching — title scoring and recording-version checks.
- ✓ YouTube + SoundCloud search — inspect candidates before choosing.
- ✓ Spotify CSV importing — turn exported playlists into local audio.
- ✓ Duration verification — compare batch downloads with the CSV's expected duration.
- ✓ Metadata tagging — write artist, album, and other available CSV tags.
- ✓ Resumable batches — skip completed tracks whose files still exist.
- ✓ Retry queue — return to failed downloads later.
- ✓ aria2 acceleration — optional, with a Requests fallback in automatic mode.
- ✓ Windows / Linux / macOS — one CLI and platform-aware storage paths.
As a Spotify playlist downloader, Frogify starts from an exported CSV. It finds audio through supported search sources; it does not download Spotify streams or accept playlist URLs.
# Download a track
frogify "Massive Attack - Teardrop"

# Search without downloading
frogify search "Daft Punk - Something About Us"

# Choose a recording interactively
frogify "Massive Attack - Teardrop" --pick

# Download a Spotify-exported library, resuming completed tracks
frogify batch spotify.csv

# Retry failures or check your environment
frogify retry
frogify doctor
By default, downloads go to a music subfolder in your system Downloads directory.
Use --output "./my-music" for one command, or set download.directory for future downloads.
Batch resume skips completed files that still exist; missing files are downloaded again.
Retries use each failure's saved destination unless you pass --output.
CSV files must be UTF-8 with the exact columns Track URI, Track Name, Artist Name(s),
and Duration (ms). Required values must be nonempty, and duration must be a positive,
finite number of milliseconds. Separate multiple artists with semicolons.
Inspect settings, choose a default destination, or allow more time for provider retries:
frogify config
frogify config path
frogify config set download.directory "~/Downloads/music"
frogify config set network.retry_profile patient
To preserve the source audio format in CSV batches, disable metadata tagging with
frogify config set metadata.enabled false. Download engines are auto, aria2, and
requests; retry profiles are fast, balanced, and patient.
Frogify does not simply take the first search result.
Query or Spotify CSV track
          ↓
Discover candidates
          ↓
Score titles + check recording versions
(CSV: also compare artists + expected duration)
          ↓
Rank candidates → reject unsafe automatic matches
          ↓
Download → validate audio
(CSV: verify downloaded duration)
          ↓
Save audio · CSV batches also write metadata
search and --pick show the source, duration, and match score out of 100. These scores
are ranking heuristics, not accuracy percentages. Automatic downloads try up to three accepted
candidates by default. Set matching.candidate_attempts to change the limit, or use
--candidate-attempts for a single-track download. --pick lets you choose explicitly.
The Spotify downloader workflow uses CSV metadata. The YouTube Music downloader workflow searches YouTube recordings through MP3Juice and its resolution providers, alongside SoundCloud; there is no official YouTube Music API integration. Free-text downloads preserve the source audio format. CSV metadata tagging uses FFmpeg, copying MP3 input without re-encoding and converting other formats to MP3 when tagging is enabled.
Contributions and feedback on matching accuracy are welcome. From a cloned checkout, install the development environment and run the checks:
uv sync --locked --python 3.13
uv run --locked pytest
uv run --locked ruff check .
uv run --locked ruff format --check .
uv run --locked pyright
Include a clear reproduction for bug reports and explain how changes were verified. Do not commit personal CSV exports, audio downloads, credentials, or local state.
Frogify's own source is MIT licensed; the license text is in LICENSE. The standalone
executable includes third-party components with separate terms. Its archive and installation
include THIRD_PARTY_NOTICES.md, the component inventory, and license texts; corresponding
source is provided as a separate asset on the same release.
Use Frogify only for audio you are permitted to access and in accordance with the relevant service terms. Frogify is not affiliated with Spotify, YouTube, YouTube Music, SoundCloud, MP3Juice, or Theta.